Thesis Update - Nearly There!
I probably would have been at this point several days ago, but I went with the Theory "batiste" from my swatches, and it proved to be more like a tightly-woven percale, and I was having the hardest time getting pins and needles into it. Let this be a lesson: always test a swatch by pleating it heavily and putting a pin into it. Since it didn't work, I went to Joann's in Queensbury and got some rather cheap Sew Essentials muslin, which actually seems like a reasonably close approximation for period muslin, to me. Maybe a little less transparent, but it's very light. Anyway, I then went ahead with the petticoat of my own design.

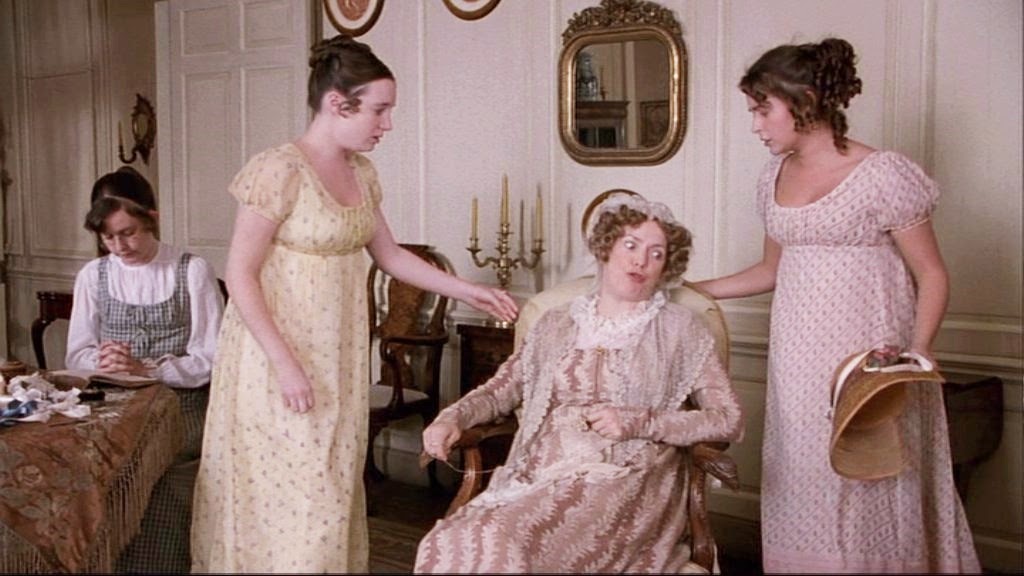
The skirt is two panels, each the full width of the fabric, as it had a really nice selvedge and I wanted to take advantage of that for the seam allowances. There's an inner and an outer waistband, each also the width of the fabric and about an inch wide without seam allowance. Between them, I sandwiched the skirt fabric, pleated up to fit, and sewed them together with a running stitch. Then I folded the top edge of the waistbands in, sandwiching the bodice between them and slip-stitching them together through the bodice. I put in an eyelet about an inch from the end on either side, and threaded a tape through the waistband.

The bodice is also two pieces, so that I could make use of selvedges for the back edges - while the waistband can be the full width as I planned for it to possibly overlap at center back, I wanted the bodice to end at the straps, so I wouldn't need to fasten the bodice itself. Each piece has a straight bottom, one side 3" long and one 5" (center front), and a shallow curve connecting the two. The straps are my wider tape (3/4", I think), sewn into the waistband with the bodice and sewn to the bodice with running stitches.
Technically, I could have just gone with the straps on their own, but I thought that a) just straps would cause the skirts to hang oddly, from the four points where the straps were attached, and b) it might be good to have a smooth layer over the corset.
Some pictures with it all on (please ignore wrinkles):

Okay, so - am I the only one who really likes the silhouette you see in fashion plates when the women are holding up their trains, and there's a kind of entasis-like curve outward between the feet and the waist? I picked up my train and it was there like whoa, as we used to say. Very happy about that, also about the ruching between the neckline and waist.

~Artistic pose.~ I was trying to show the train, which I think may be too dramatic, but I kind of like it anyway.
So, in conclusion, I think this is an excellent way to construct a bodiced petticoat, and it's probably a good idea to have one for the late 1790s.
All that's left of the sewing part of the project is to hem the petticoat and sew up the CB, and to lengthen the pleats on the back of the dress. I also want to do something to the corset - it just doesn't feel quite right. I think tightening the gathering in the "cups" should help, as they function much more as soft/elastic portions that allow the corset to be more naturally curved than as the cups I actually intended them to be. To be honest, I'm not entirely sure what it would take for me to be able to make actual cups in stays that would fit me - I think maybe the body would have to be entirely boned, and the cup might have to be cut deeper. Also: LACING GAP, why is it so hard for me to incorporate a lacing gap?

I wish my thesis or finals ever involves historical costume! Lucky girl, and you look beautiful <3
ReplyDeleteI just read through you past posts to catch up on your thesis, what an interesting project! I look forward to seeing your progress!
ReplyDeleteThanks for checking it out!
ReplyDeleteThat is a beautiful, painstaking and wonderful work. Congratulations.
ReplyDeleteThanks so much, Bara.
ReplyDelete